Top 3 Moulding Mistakes
From costs to appearance to making sure it’s done perfectly, doing a project yourself can be so much better and easier…except when it isn’t. If you’re inexperienced or even if you’re not, mistakes can happen, putting the project you’re working on in jeopardy and cutting into your budget and time. Here, The Moulding Company goes over top three common mistakes made when installing trim and moulding in your home.
Improper measurements
While it seems like a given, improper measurements can wreck your whole project. You either end up leaving gaps from pieces cut too short, or you can’t get the corners to look just right because somehow you got the angle and length wrong. Doing thorough research to ensure you know how to measure the pieces you need is paramount to success and the best way to avoid measuring mistakes. Even then, though, accidents happen, and this brings us to our next point.
Installation injuries
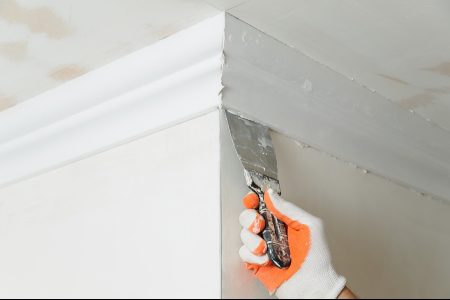
Installation injuries can be an unfortunate part of any project, but with the nailing, gluing, cutting, and prying or banging that go on during the installation of trim and moulding, they’re almost impossible to avoid when doing it yourself. Whether it’s dents in your drywall, scratches on your paint, or gaps left between trim pieces, leaving these installation injuries unaddressed can result in a job that appears shoddy and lazily completed when that’s far from the case.
Making sure to repair or cover those injuries can make it like it never even happened, and people won’t doubt your ability to pull off an incredible do-it-yourself job. For instance, gaps in trim can be solved with the use of small rosette blocks or smaller pieces of trim to fill the space seamlessly. Broken drywall should either be covered by paneling (if that’s what you’re already installing) or trim, if possible, but if it’s too high up the wall or not part of your plan, you should repair it. Scratches in paint above where you’re installing the trim can be solved with the application of more paint, the biggest challenge there being finding the exact color that matches your walls.
Not sanding edges
Another all-too-common mistake is not getting smooth edges on your pieces of trim. The process of sanding the edges of each piece of trim is often overlooked or not thought about, because the edges can look smooth or be the last concern. If you don’t sand them, though, they can refuse to line up properly or leave tiny gaps in between pieces—tiny, but hugely noticeable. Sanding the ends of trim can make them go together seamlessly and smoothly, as well as stay aligned and make any adhesive hold better.
Hire a professional
While these are three of the most common mistakes made when completing a moulding or trim job in your home, they aren’t the only ones that can be made, and there’s a surefire way to prevent yourself from making them. If you aren’t experienced with do-it-yourself projects or you don’t know where to begin with installing trim, hire a professional. They have experience, training, expertise, and boundless knowledge on your trim and moulding projects; even if you don’t hire them to complete the job, most will give you tips and advice or help walk you through how to do it. Most professionals are insured to cover any mistakes that they might make, and if mistakes occur, they’ll be the ones paying for them with their money and time, not you. They’ll also know the best way to fix it from their experience. The Moulding Company has a full team of experts on moulding and trim, and we can help you decide if you’re up to the job or if you need some help. Call us today for help with your trim project.